
Most people don’t realize how much grime collects between their keys until a spacebar starts sticking or the laptop begins smelling faintly of last week’s lunch. Learning how to clean laptop keyboard surfaces properly matters because oils from your fingers, dust, crumbs, and even pet hair settle into the gaps every single day, quietly building up beneath the keycaps where you can’t easily see it. Over weeks and months, this hidden layer of grime becomes far harder to remove than if it had been addressed early, which is why understanding the right approach from the start makes such a difference.
Ignoring this buildup isn’t just a hygiene issue it can genuinely shorten the lifespan of your device. Sticky keys, unresponsive switches, and corrosion caused by spilled liquids are all common results of a neglected keyboard, and repairs for these issues can be far more expensive than a few minutes of routine maintenance. This guide walks you through a safe, five-step process that works across most major laptop brands, including Windows machines and MacBooks, so you can keep your device performing reliably for years without unnecessary wear.
What You’ll Need Before You Start Cleaning
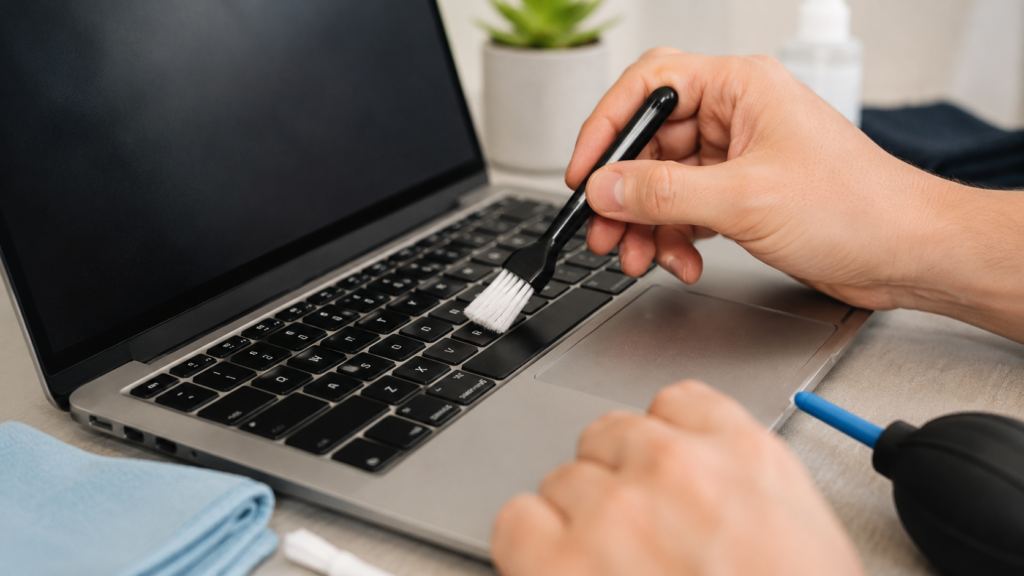
Before diving into how to clean laptop keyboard surfaces the right way, it helps to gather a few simple supplies in advance so you’re not pausing mid-task. You’ll want a can of compressed air, isopropyl alcohol at roughly 70–99% concentration, a lint-free microfiber cloth, a soft-bristle brush such as an old toothbrush or a clean makeup brush, and a handful of cotton swabs for reaching narrow spaces between keys that larger tools simply can’t access.
A small handheld vacuum fitted with a brush attachment is optional but genuinely useful for loosening stubborn debris that has settled deep into the gaps. Steer clear of household cleaning sprays, bleach-based products, or anything heavily scented, since these formulas can damage the protective coating on your keys or leave behind a sticky, hard-to-remove film. Paper towels are also worth avoiding for this task, as they tend to shred easily and leave lint fibers scattered across the keyboard surface.
Step One: Power Down and Fully Disconnect
The very first rule in any reliable how to clean laptop keyboard routine is shutting the device down completely rather than simply putting it to sleep. Sleep mode still leaves the system partially active, meaning accidental keystrokes or background processes could interfere while you work, and a live electrical connection paired with moisture or falling debris creates a real safety risk that’s simply not worth taking for the sake of convenience.
Once the laptop is fully powered off, unplug the charging cable and disconnect any peripherals such as an external mouse, keyboard, or USB drive. If your particular model has a removable battery, take it out as an added precaution before you begin. This extra step protects the internal circuitry from unexpected surges and gives you complete, uninterrupted control while working carefully through the remaining stages of the cleaning process ahead.
Step Two: Remove Loose Debris First
With the laptop safely powered down, turn it upside down and gently shake or tap the back panel to dislodge crumbs, dust clusters, and stray hair that have settled between the keys over time. You’ll likely be surprised by just how much falls out from this simple motion alone, particularly if it’s been several weeks or longer since your last proper cleaning session, making this an oddly satisfying first step.
Next, use compressed air in short, controlled bursts, sweeping in a left-to-right motion across the rows of keys rather than spraying straight downward into the gaps. Spraying directly down can actually push debris deeper into the mechanism instead of clearing it out, undoing your progress. A handheld vacuum with a soft brush attachment set to low suction works as a reliable alternative during this stage of the process.
Step Three: Clean Between and Under the Keys
This is where most people genuinely mastering how to clean laptop keyboard grooves see the biggest improvement in results. Use your soft-bristle brush to sweep gently along the edges of each key, dislodging the finer particles that compressed air alone typically can’t reach. Follow this up with a cotton swab lightly dampened in isopropyl alcohol to target stubborn spots or visible residue trapped along the key edges and surrounding frame.
Some laptop models allow individual keycaps to be popped off carefully for a deeper, more thorough clean, though this varies considerably depending on the brand and build. Standard scissor-switch keyboards found on many Windows laptops tend to be more forgiving of this process, while certain MacBook keyboards are not designed for user removal at all, and attempting it yourself may end up voiding your warranty entirely.
Step Four: Wipe Down the Keyboard Surface
Once the gaps and undersides have been addressed, dampen your microfiber cloth lightly with isopropyl alcohol or water — never soak it — and wipe across the key tops and surrounding surface in one consistent, even direction. This motion lifts away accumulated oils and light staining effectively without pushing excess moisture down into the delicate switch mechanisms sitting beneath each key.
If you’re dealing with a sticky residue left behind by a spill or discoloration from food, a slightly more concentrated alcohol solution applied to the cloth can help lift it, using light, even pressure rather than aggressive scrubbing that might damage the key printing. Isopropyl alcohol also functions as a mild disinfectant, which proves especially useful if the laptop is regularly shared among multiple people.
Step Five: Dry Completely and Reassemble
Patience genuinely matters at this stage. Let the keyboard air dry fully for at least fifteen to twenty minutes before reconnecting the battery, plugging the charger back in, or powering the laptop on again. Turning the device on while any dampness remains risks short-circuiting sensitive internal components positioned directly beneath the keys, potentially undoing all the careful work completed in the earlier steps.
Once everything is thoroughly dry, reassemble the laptop and test each individual key to confirm it responds normally under light pressure. If a handful of keys still feel stiff after following every stage of how to clean laptop keyboard maintenance correctly, a very light application of electronics-safe lubricant on the switch mechanism can sometimes help, though persistent problems may call for professional repair instead.
Handling Spills and Deep Stains
A liquid spill demands immediate, calm action rather than panic. Power the laptop off instantly, tilt it upside down to allow excess liquid to drain away from internal components, and resist any urge to reboot it right away just to check whether it still works. Giving the device sufficient time to dry fully first can prevent permanent, costly damage to the motherboard underneath.
Minor spills involving plain water can often be resolved using the steps outlined above, but sugary drinks, alcohol, or anything sticky may require full professional disassembly to clean properly. If keys remain unresponsive or show visible corrosion after drying thoroughly, it’s far safer to consult official manufacturer support than to keep attempting further DIY fixes on your own.
How Often Should You Clean Your Laptop Keyboard
For light, occasional use, a thorough cleaning roughly every four to six weeks is generally sufficient to keep things in good shape. If you frequently eat near your laptop, work in a dusty environment, or share the device with others regularly, aim for a shorter cycle of every two to three weeks instead to prevent buildup from becoming a larger, more time-consuming problem later on.
Watch for warning signs between your scheduled cleaning sessions, including keys that feel gritty underfoot, a faint lingering odor, or visible grime gathering around the edges of the keyboard tray. Small daily habits, like using a fitted keyboard cover or simply keeping food and drinks well away from your workspace, go a long way toward reducing how frequently deep cleaning becomes necessary.
Mistakes to Avoid When Cleaning a Laptop Keyboard
Even with the best intentions, it’s remarkably easy to cause damage during a cleaning session. Skip harsh household sprays, bleach, or ammonia-based cleaners entirely, as these formulas can strip the protective coating off your keys or seep down into sensitive electronics. Fully soaked cloths or wipes are another common mistake worth avoiding, since excess liquid remains the single biggest enemy of any keyboard’s longevity.
Avoid using sharp objects like knives or flathead screwdrivers to pry keys loose, since doing so can easily snap the delicate retention clips holding each key in place underneath. Likewise, steer clear of running a full-size household vacuum directly over the keys, because the strong suction combined with static charge can potentially damage sensitive internal switches that are far more fragile than they appear.
Read More: https://techustime.co.uk/why-does-my-laptop-keep-disconnecting-from-wifi/
FAQs
Can you use alcohol wipes on a laptop keyboard?
Yes, in moderation, provided you choose wipes with a high isopropyl alcohol content and avoid those containing added moisturizers or fragrance, which tend to leave a sticky residue behind. Wipe lightly rather than saturating the keys, and always allow the surface to air dry completely before powering the laptop back on.
Can I remove laptop keyboard keys to clean them?
It depends entirely on your specific model. Many standard Windows laptops with scissor-switch keys allow safe removal for a deeper clean, but several MacBook keyboards are not designed for this at all, and removing keys yourself may end up voiding your warranty. Always check official manufacturer guidance before attempting it.
Is it okay to clean a laptop keyboard with wet wipes?
Wet wipes can work reasonably well for a quick surface pass, but they often carry excess moisture and can leave behind lint fibers or chemical residue on the keys. A barely damp microfiber cloth paired with isopropyl alcohol is generally a safer, more controlled alternative for regular maintenance.
Can I clean my laptop keyboard with hand sanitizer?
It’s not ideal for this purpose. Most hand sanitizers contain added moisturizers, fragrances, or gel-based thickeners that can leave a sticky film across your keys once they dry. Stick with pure isopropyl alcohol instead, which evaporates cleanly and leaves no residue behind on the surface.
What should I do if my laptop keyboard keys are still sticky after cleaning?
Try a very light application of electronics-safe lubricant directly on the affected switch mechanisms. If keys remain unresponsive or continue feeling gritty despite thorough cleaning, the underlying issue may run deeper than surface grime, and professional disassembly or repair could be the safer, more effective next step.
How often should I clean my laptop keyboard?
For typical daily use, cleaning every four to six weeks is a solid baseline to follow. If you frequently eat near your laptop, work in dusty conditions, or share the device regularly with others, shortening that cycle to every two to three weeks will help prevent heavier, harder-to-remove buildup over time.
Conclusion
Keeping your keyboard clean doesn’t require expensive tools or a trip to a repair shop — just a consistent, careful routine you can repeat every few weeks. By now, you have a complete answer to how to clean laptop keyboard surfaces safely: power down, clear loose debris, clean between the keys, wipe the surface, and let everything dry fully before reassembling the device and testing it.
Making this a regular habit, rather than a last resort once keys start sticking or smelling unpleasant, will extend your laptop’s overall lifespan and keep your daily workspace noticeably healthier. Bookmark this guide so it’s ready the next time your keyboard needs a proper refresh, and share it with anyone who could use a safer cleaning routine.