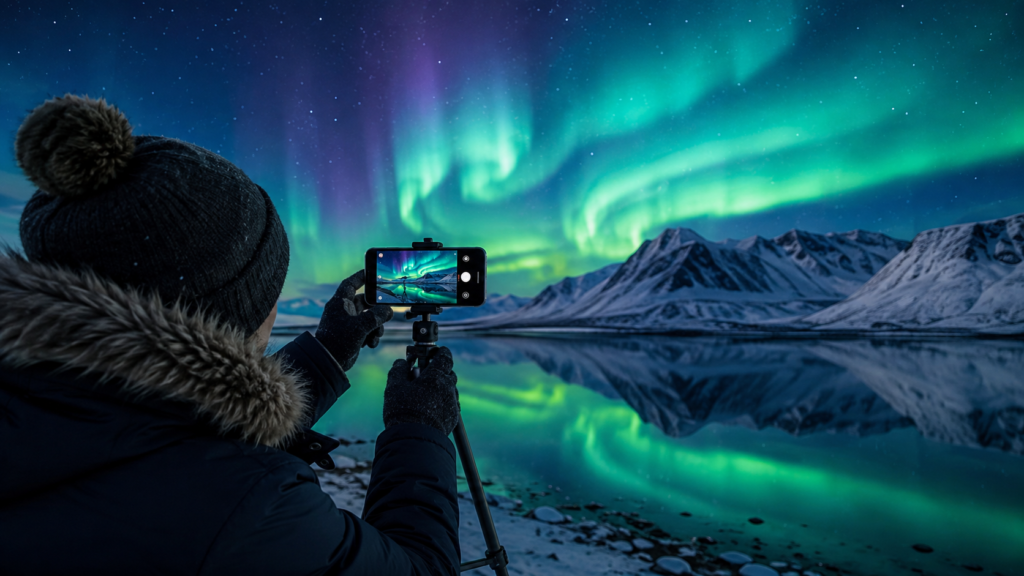

Watching the aurora borealis ripple across a dark sky is a moment most travelers never forget, yet many walk away with nothing but a black, grainy photo to show for it. The truth is, you no longer need a heavy DSLR or years of photography experience to capture this natural phenomenon. If you’ve been searching for how to take pictures of northern lights with smartphone technology alone, this guide breaks down the exact settings, gear, and habits that make it genuinely achievable.
Today’s smartphones come equipped with impressive low-light sensors and computational photography features that were once exclusive to professional cameras. With a bit of planning and patience, these tools let ordinary travelers walk away with vivid, shareable aurora images using nothing more than the device already in their pocket. The rest of this guide covers everything from essential gear to editing tricks that bring your final shots to life.
What You Need Before You Start
Before chasing the lights, it helps to understand what your device can realistically handle. Most phones released in the past several years, including iPhone 11 and newer models, as well as Android flagships with Night Mode or Pro Mode, can capture usable aurora photos. Older or budget devices without dedicated low-light modes may struggle significantly, so it’s worth testing your phone’s performance in dim conditions ahead of time rather than discovering its limits under a live sky.
A handful of accessories make a real difference once you’re in the field. A compact tripod keeps your phone completely still during multi-second exposures, since even the smallest shake will blur faint aurora detail. A Bluetooth remote or built-in timer avoids the shake caused by tapping the screen directly. Cold weather also drains batteries far faster than usual, so a portable charger is worth packing. Checking a KP index or an auroral forecast app beforehand also helps you time your outing around genuine solar activity rather than waiting under an inactive sky.
Seven Pro Tips for Photographing the Northern Lights on Your Phone
Learning how to take pictures of northern lights with smartphone settings really comes down to mastering a small set of core adjustments. Start with stabilization, since this single factor determines whether your exposure turns out sharp or hopelessly blurred. Rest your phone on a tripod, a rock, or even a parked car’s roof, because any movement during a multi-second capture will ruin the shot, regardless of how good your other settings are.
From there, switch on Night Mode or Pro Mode, so your phone gathers more light over a longer window instead of relying on a quick flash-based snapshot that won’t register the aurora. Manually extend your exposure time to somewhere between three and ten seconds, since shorter windows miss faint light and longer ones can blur the aurora’s natural movement across the sky. Lower your ISO slightly to reduce graininess, and switch focus to manual, setting it to infinity so the camera isn’t hunting blindly in the dark.
Always turn off flash entirely and resist the urge to zoom in digitally, since zooming simply crops and degrades quality rather than magnifying real detail worth keeping. If your phone supports RAW or ProRAW capture, use it, because the extra data gives you far more flexibility when editing later. Finally, don’t just aim straight up at empty sky. Framing your shot with a mountain, tree line, or reflective lake adds scale and turns a simple sky photo into a genuinely memorable image.
Best Camera Settings by Phone Type
iPhone users can access most of these controls directly inside the native Camera app without downloading anything extra. Wait for Night Mode to appear automatically in low light, then tap the yellow icon in the top corner to drag the exposure slider to your desired duration manually. Newer iPhones with ProRAW support also unlock more advanced editing possibilities afterward, letting you recover detail that a standard JPEG would otherwise lose entirely.
Android users typically need to switch into Pro or Manual mode, which unlocks direct control over ISO, shutter speed, and white balance rather than leaving everything automated. Because Android manufacturers vary widely in menu layouts and terminology, the exact steps for photographing the northern lights with Android smartphones can differ slightly across brands, though the underlying principles remain consistent. For photographers wanting even finer control, third-party apps like ProCam or Camera FV-5 replicate a professional manual dial interface within a simple mobile app.
Common Mistakes to Avoid
Even with the right settings dialed in, small oversights can quietly ruin an otherwise promising shot. Shooting handheld without any stabilization remains the most frequent mistake people make, since even remarkably steady hands introduce enough motion blur to wash out faint aurora detail during a multi-second exposure. A tripod, railing, or flat surface isn’t a nice-to-have here; it’s genuinely essential to getting anything usable.
Other common pitfalls include leaving flash enabled, which illuminates only the immediate foreground and does nothing for the sky, and relying on digital zoom, which noticeably degrades sharpness rather than truly magnifying anything. Photographers also frequently forget to scout locations away from streetlights and city glow, or fail to prepare their phone battery for freezing conditions, both of which can cut an otherwise perfect aurora session frustratingly short.
Editing Tips to Enhance Your Aurora Photos
A little post-processing goes a long way toward revealing colors your eyes may have genuinely missed in the moment. Mobile apps like Snapseed or Lightroom Mobile allow you to fine-tune contrast, correct white balance, and reduce noise introduced by higher ISO settings, all without needing a desktop computer or years of editing experience to get solid, natural-looking results.
That said, restraint matters just as much as skill here. Oversaturating greens and purples might look striking at first glance, but it quickly turns an authentic aurora photograph into something that reads as artificial or overly processed. Aim for adjustments that enhance what was genuinely visible in the sky rather than inventing colors and contrast that were never actually there to begin with.
Best Times and Places to Photograph the Northern Lights
Timing plays just as large a role as camera settings in aurora photography. The hours between 10 p.m. and 2 a.m. tend to offer the strongest activity, particularly during the equinox months of September and March, when geomagnetic activity typically peaks worldwide. Checking a real-time aurora forecast before heading out saves you from standing under a clear but completely inactive sky for hours.
Location matters just as much as timing does. Destinations like Iceland, Norway, Alaska, and northern Canada remain popular for good reason, offering minimal light pollution and wide, unobstructed horizons ideal for aurora viewing. Since smartphone sensors are considerably smaller than dedicated cameras, choosing a genuinely dark-sky location makes an even bigger difference in how much detail and color your phone can ultimately capture.
Read More: https://techustime.co.uk/what-are-the-skills-required-for-software-development/
FAQs
Can I photograph the northern lights with any smartphone?
Most phones released in the last several years with Night Mode or Pro Mode can capture the aurora reasonably well, though results vary by device. Older or budget models with limited low-light capability may still produce dimmer, noisier images even with ideal settings applied.
What is the best exposure time for aurora photos on a phone?
Somewhere between three and ten seconds usually works best for most conditions. Shorter exposures often miss faint light entirely, while significantly longer ones can blur the aurora’s natural movement across the sky into an indistinct smear.
Do I really need a tripod to photograph the northern lights?
Yes, stabilization is genuinely essential for long exposures to succeed. Even slight handheld movement will noticeably blur the final image, so a tripod, railing, or any flat, steady surface makes a substantial difference in your results.
Why do my northern lights photos look better on camera than in real life?
Long exposures gather far more light than the human eye can process in real time, which is exactly why phone cameras often reveal brighter colors and finer detail than what you actually perceive while standing outside.
What ISO should I use for aurora photography on a smartphone?
A moderate ISO, generally in the low hundreds, tends to balance brightness against noise most effectively. Pushing ISO too high introduces graininess that becomes genuinely difficult to correct cleanly during later editing.
Can I use my phone’s zoom to photograph the northern lights?
It’s best to avoid it altogether. Digital zoom simply crops and degrades the image rather than truly magnifying anything useful, so shooting wide and cropping afterward during editing preserves noticeably more quality.
How cold-resistant do phones need to be for aurora photography?
Most phones tolerate brief cold exposure reasonably well, but batteries drain considerably faster in freezing temperatures. Keeping your phone in an inner pocket between shots and carrying a portable charger helps avoid an untimely shutdown.
Conclusion
You don’t need expensive, specialized equipment to capture one of nature’s most spectacular displays overhead. Once you understand how to take pictures of northern lights with smartphone settings like Night Mode, manual exposure, and proper stabilization, you’re already fully equipped to walk away with shots worth sharing. Practice these settings on any clear night before your trip so you’re not fumbling through unfamiliar menus the moment the sky finally lights up.