

A slow laptop doesn’t always need to be replaced. In many cases, the real issue is insufficient memory struggling to keep up with modern apps, browser tabs, and background processes. Learning how to install memory in a laptop is one of the most rewarding upgrades you can make yourself, requiring minimal tools, under 20 minutes of your time, and no advanced technical background. This guide walks through the entire process from diagnosis to verification, with a companion video for anyone who prefers to watch before they act.
Signs Your Laptop Needs More Memory
Before you commit to buying new RAM, it helps to confirm that memory is actually the bottleneck slowing your System down. Common symptoms include noticeable lag when switching between open applications, browser tabs reloading unexpectedly, programs crashing without warning, and a general sense that everything takes longer than it used to. These issues tend to intensify gradually, so many users don’t realize how much performance they’ve lost until they compare it to a freshly upgraded machine.
Checking your current memory usage takes only a moment and can confirm whether an upgrade is worthwhile. Windows users can open Task Manager and review the Performance tab, while Mac users can click the Apple menu and select “About This Mac” to view memory statistics. If usage consistently approaches your total installed capacity during normal tasks, that’s a strong indication that learning to install memory in laptop components will meaningfully improve your everyday experience.
What to Check Before You Buy New RAM
Not every laptop supports a memory upgrade, so this step matters more than people expect. Many modern ultrabooks and thin-and-light models solder memory chips directly onto the motherboard, which makes physical upgrades impossible without professional-grade equipment. Before spending money on new modules, search for your exact laptop model on the manufacturer’s support page, or run a system information tool to confirm whether SO-DIMM slots are accessible and what the maximum supported capacity is.
Compatibility goes beyond simply having open slots. RAM comes in different generations, such as DDR3, DDR4, and DDR5, and these are not interchangeable. Speed ratings, measured in MHz, also need to align reasonably well with your existing hardware to avoid instability. Taking five extra minutes to verify your laptop’s exact specifications before purchasing prevents the frustration of receiving an incompatible module that won’t fit or function correctly.
Tools You Need to Get Started
One appealing aspect of this upgrade is how little equipment it requires. A small Phillips screwdriver, typically a #0 or #00 size, is usually enough to remove the back panel or dedicated memory door on most laptops. Beyond that, you’ll want a plastic pry tool for models with clipped rather than screwed panels, since forcing a panel open with metal tools risks scratching or cracking the casing.
Static electricity is invisible but can permanently damage sensitive components, so an anti-static wrist strap is strongly recommended for anyone new to hardware work. If you don’t own one, simply touching a grounded metal object periodically throughout the process offers a reasonable alternative. Combine these basics with a clean, well-lit workspace and your compatible RAM module, and you’re fully equipped to begin the installation.
The Complete Installation Process
Start by shutting your laptop down completely and unplugging every cable, including the charger. If the battery is removable, remove it and hold the power button for about 10 seconds to discharge any residual electrical charge stored in the System. This precaution protects both you and the internal components from unexpected static discharge or accidental short circuits during the upgrade.
After grounding yourself, locate the memory compartment, which may be a small, dedicated panel or part of the bottom cover, depending on your model. Once opened, you’ll see the existing memory modules resting in their slots, held by small retaining clips on each side. If you’re replacing an existing module, gently press these clips outward until the stick tilts upward, then slide it free.
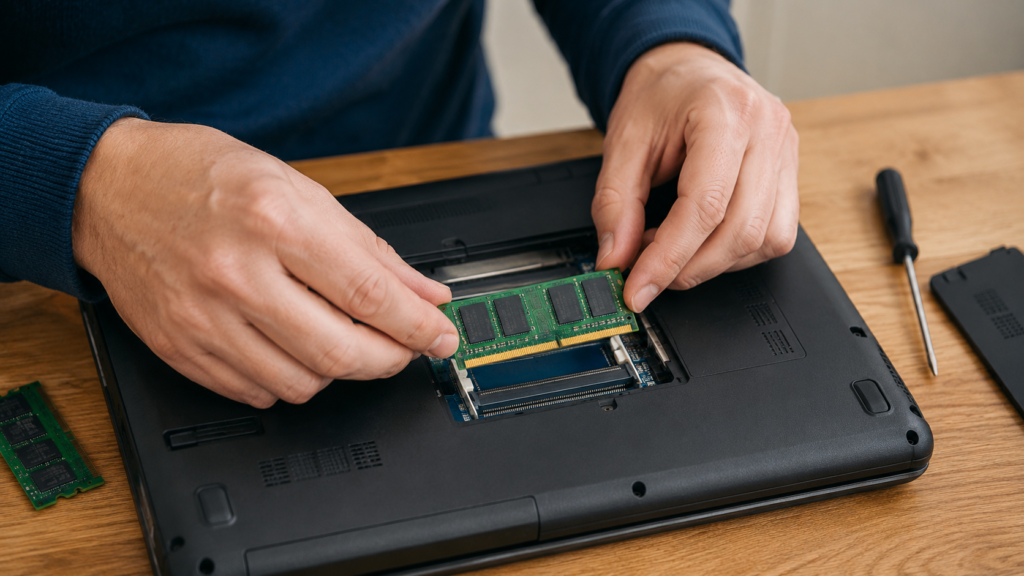
To install your new RAM, align the notch along the bottom edge of the module with the matching ridge inside the slot. Insert it at roughly a thirty-degree angle and press down firmly until the side clips snap into place automatically. Once both modules feel secure, reattach the back panel, reinsert the battery, and reconnect your charger before powering the laptop back on.
Confirming Your Upgrade Worked
After restarting your laptop, take a moment to confirm the installation was successful rather than assuming everything went smoothly. On Windows, navigate to Settings > System > About and compare the listed memory figure with what you expect to see. Mac users can check the same details under “About This Mac.” A mismatched number usually points to a module that isn’t fully seated.
For extra peace of mind, running a diagnostic tool such as Windows Memory Diagnostic or the third-party MemTest86 can rule out defective hardware before you trust the laptop with important work. If your System doesn’t recognize the new memory at all, power down, carefully remove the module, and reseat it, double-checking that the notch aligns properly with the slot before pressing firmly again.
Mistakes That Cause Unnecessary Problems
The most common error people make is ordering memory that doesn’t match their laptop’s supported type or speed, which can prevent the System from booting. Always verify compatibility with your exact model number rather than relying on general assumptions, and avoid choosing a module solely because it’s the cheapest option, since an incompatible part offers no real savings.
Skipping proper grounding is another frequent mistake, and static damage isn’t always immediately obvious, sometimes causing problems that appear weeks later. Forcing a module into a slot at the wrong angle, mixing significantly different capacities without research, and ignoring manufacturer-specific disassembly instructions all turn what should be a simple project into an unnecessarily stressful one.
When Professional Help Makes More Sense
If your laptop uses soldered memory, no amount of preparation will make a DIY upgrade possible, and attempting one risks permanent damage to the motherboard. Likewise, if your warranty terms explicitly forbid self-service hardware changes, paying a certified technician to complete the upgrade may be the smarter route to preserve your coverage and avoid voiding support entirely.
Certain ultrabook and convertible laptop designs also require extensive disassembly to access the memory compartment, which involves adhesive seals, hidden fasteners, or delicate internal cables. In these situations, the risk of accidental damage often outweighs the cost savings of doing it yourself, making professional installation the more practical and ultimately safer choice for your device.
Watch the Full Video Walkthrough
For readers who learn best by watching rather than reading, our companion video demonstrates the entire process from powering down the laptop to confirming the new memory is correctly recognized. Seeing each step performed in real time can build confidence before you pick up a screwdriver yourself, particularly if this is your very first hardware upgrade attempt.
Pairing this written guide with the video gives you both the detailed reasoning behind each step and a clear visual reference to follow. Together, they offer a complete resource for anyone wondering how to safely install memory in laptop hardware, whether you’re a complete beginner or want a refresher before starting.
Read More: https://techustime.co.uk/how-to-fix-slow-laptop/
FAQs
How do I know how much RAM my laptop can support?
Check your manufacturer’s official specifications page or use a compatibility scanner tool to confirm the maximum memory capacity supported by your specific laptop model before purchasing anything.
Can I install RAM myself, or do I need a professional?
Most laptops with accessible memory slots allow safe do-it-yourself installation with basic tools, though soldered-memory models or complex teardown designs typically require professional assistance.
Is 8GB or 16GB of RAM enough for a laptop in 2026?
8GB suits basic browsing and office tasks, 16GB comfortably handles multitasking, and 32GB or more is recommended for gaming, video editing, or other demanding professional workloads.
Can I mix different RAM brands or sizes?
It’s technically possible, but matching capacity, speed, and generation across modules generally delivers more stable and consistent performance than combining mismatched brands or sizes.
Will upgrading my RAM void the laptop’s warranty?
This depends entirely on the manufacturer; some brands explicitly permit user upgrades without affecting coverage, while others require certified service technicians to maintain warranty validity.
What happens if I install incompatible memory?
The laptop may fail to boot or fail to detect the new module, so always confirm RAM type, generation, and speed compatibility before making a purchase.
How long does the entire installation process take?
Most installations take between ten and twenty minutes total, covering shutdown, panel removal, module installation, reassembly, and a final restart to confirm everything works correctly.
Final Thoughts
Upgrading your laptop’s memory is one of the most accessible hardware projects available to everyday users, requiring only basic tools and careful attention to compatibility. With the steps outlined above, you can transform a sluggish, frustrating machine into a noticeably faster one in under twenty minutes. Check your laptop’s specifications today and take the first step toward a smoother, more responsive computing experience.