
Why Learning How to Shoot with a Smartphone Matters Today
Smartphones have quietly become the most powerful cameras most people will ever own, and the footage they produce can now rival dedicated equipment when used correctly. Learning how to shoot with a smartphone properly is no longer a niche skill reserved for hobbyists — it has become essential for creators, marketers, small business owners, and everyday users who want their photos and videos to look intentional rather than accidental. The technology gap between phone cameras and professional gear has narrowed dramatically, but skill still determines the final result far more than hardware specifications ever will.
This guide breaks down ten practical, pro-level techniques covering lighting, stability, camera settings, composition, audio, and editing, all designed to help you produce noticeably better content without buying expensive equipment. Whether you’re filming a product demo, documenting a trip, or capturing a quick moment for social media, these tips will help you achieve consistent, polished results. Mastering how to shoot with a smartphone starts with understanding a handful of fundamentals and applying them consistently every time you pick up your phone to shoot.
Why Smartphone Content Dominates Social Media
Platforms like Instagram Reels, TikTok, and YouTube Shorts are built around smartphone-first content, meaning both algorithms and audiences tend to favour footage that feels native and authentic over anything that looks overly staged or produced. Creators who understand how to shoot with a smartphone effectively can compete directly with brands that use expensive camera rigs simply by applying smarter, more deliberate techniques rather than relying on costly equipment to compensate for weak fundamentals.
Cost and convenience are the two biggest advantages of shooting this way. A phone is always in your pocket, ready to capture a moment instantly, while a DSLR or mirrorless camera requires planning, charging, and carrying extra gear that isn’t always practical. That convenience only pays off when it’s paired with real skill, though — a poorly lit, shaky, or badly framed smartphone video still looks unprofessional, regardless of how advanced the device’s sensor is.
Master Your Lighting First for Sharper Results
Lighting remains the single biggest factor separating amateur smartphone footage from content that looks genuinely professional. Shooting in brightly lit areas helps you avoid unwanted shadows and the grainy, noisy texture that appears whenever phone sensors struggle in dim environments. Natural daylight, especially soft indirect light coming through a window, consistently produces the cleanest and most flattering results across both photography and video, without requiring any additional equipment or setup time.
Golden hour, the short window after sunrise or before sunset, offers warm, soft light that works beautifully for portraits and outdoor scenes alike. Try to avoid shooting directly into strong backlight, since it silhouettes your subject and confuses your phone’s automatic exposure settings almost every time. When natural light simply isn’t available, a small clip-on LED panel or portable ring light can dramatically improve indoor footage without adding meaningful bulk or weight to your everyday shooting kit.
Keep Your Shots Steady and Stable
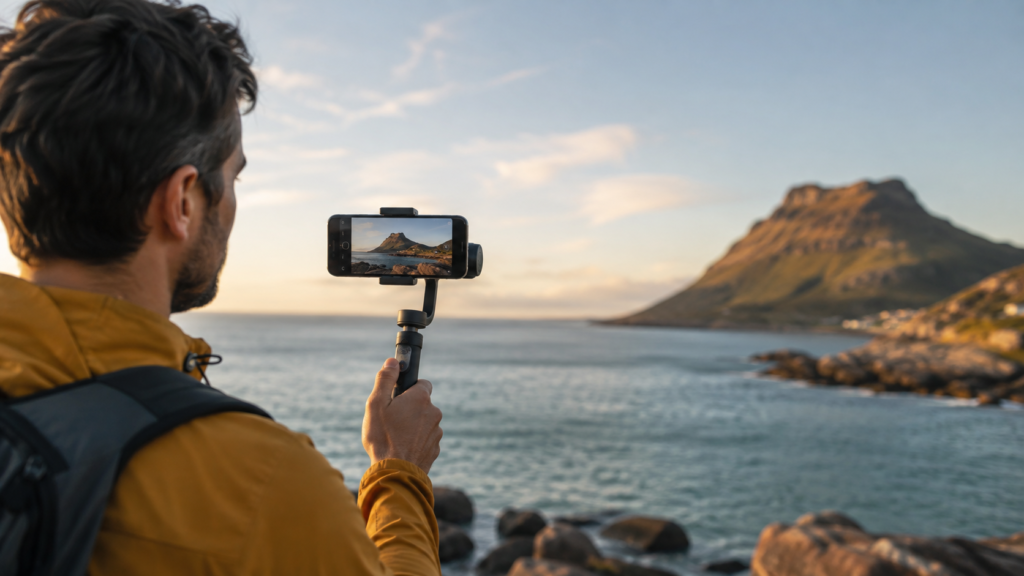
Shaky, unstable footage remains one of the fastest ways to make smartphone video look amateurish, even when everything else about the shot is technically well composed. A simple two-hand grip, with your elbows tucked close to your body, immediately reduces most unwanted handheld shake. For longer or more deliberate shots, a compact tripod or a gimbal adds smooth, cinematic movement that handheld shooting alone simply cannot replicate, especially during walking or tracking sequences.
When panning across a scene, avoid twisting your wrists to follow the action. Instead, keep the phone steady against your body and rotate slowly and evenly from your hips, keeping the motion controlled throughout the shot. This technique becomes especially important during walking shots, fast-action sequences, or vlogging segments, where the camera is constantly in motion, and even small stabilization errors become very noticeable when the footage is played back on a larger screen.
Understand and Use Your Phone’s Camera Settings
Most modern smartphones include a Pro or Manual shooting mode that unlocks direct control over exposure, focus, and white balance, features that Auto mode frequently misjudges in tricky or mixed lighting situations. Learning how to shoot with a smartphone at a genuinely advanced level means moving beyond Auto mode and manually adjusting these settings to match the specific scene in front of you, rather than letting the software make assumptions on your behalf.
Simple gestures like tap-to-focus and dragging exposure up or down make a substantial difference to overall image quality once you get comfortable using them. For still photography, shooting in RAW format preserves far more detail for later editing, while for video, deliberately choosing your frame rate matters just as much. Standard 24 to 30 fps suits most storytelling content, while 60 fps works better for smooth, high-quality slow motion, and digital zoom should generally be avoided, as it noticeably degrades image quality.
Composition and Framing Techniques That Elevate Any Shot
Strong composition instantly makes smartphone footage look more intentional and professionally considered, even when the underlying equipment is modest. Turning on your phone’s built-in grid overlay helps you apply the rule of thirds, positioning key subjects along guiding lines rather than dead centre in the frame. Leading lines, natural symmetry, and thoughtful negative space are simple but genuinely powerful tools that add visual interest to shots that would otherwise feel flat and forgettable.
Don’t be afraid to move around your subject while filming physically. Shooting from a low angle, a high angle, or an unexpected side perspective often produces far more compelling and dynamic results than standing still at eye level for every single shot. It’s also worth considering your target platform before you even start filming: vertical framing suits Reels and TikTok well. In contrast, horizontal framing remains better suited to YouTube and more traditional long-form video content.
Don’t Forget Audio Quality When Shooting
Even flawless visuals can’t fully rescue a video with muffled, echoing, or wind-distorted audio playing underneath. Many viewers will tolerate mediocre picture quality far more readily than genuinely poor sound, which makes audio one of the most overlooked aspects of smartphone content creation. If you’re serious about how to shoot with a smartphone for consistent content creation, investing in an affordable external microphone, whether lavalier or shotgun style, is one of the highest-impact upgrades you can realistically make.
When an external microphone isn’t available or practical, simply relocating to a quieter environment and shielding the phone’s built-in microphone from wind can noticeably improve your results without spending anything extra. Recording a few seconds of ambient “room tone” before or after your main clip also gives you and any editors far more flexibility later, helping smooth out awkward audio cuts and transitions during the final editing process.
Preparing Battery, Storage, and Equipment Before You Shoot
Filming and storing video files consumes significant battery power, so starting every shoot with a fully charged phone is genuinely non-negotiable if you want to avoid interruptions. Enabling aeroplane mode or do-not-disturb settings prevents calls and notifications from interrupting a take midway through, which can ruin an otherwise perfect shot and force unnecessary, time-consuming reshoots that eat into your available shooting window.
Before heading out to film, always check your available storage space, since high-resolution video files can fill up a device’s memory surprisingly quickly. It’s also worth taking a moment to wipe your lens with a soft cloth before every shooting session begins. Smudges from pockets, bags, or fingertips remain among the most common yet easily preventable causes of blurry, hazy, or low-contrast footage in countless smartphone recordings.
Editing Tips That Elevate Smartphone Footage
Editing is genuinely where good footage becomes great, finished content that people actually want to watch and share. Most mobile editing apps include colour grading tools that can correct white balance, boost contrast, and give your footage a consistent, cohesive visual style across an entire project or campaign. Trimming unnecessary dead space and tightening overall pacing keeps viewers genuinely engaged, which matters enormously on fast-scrolling, attention-scarce social platforms where every second counts.
Adding captions has become increasingly essential, since a large percentage of viewers now watch video content with the sound turned off by default. Finally, always export your finished footage at the resolution and aspect Ratio appropriate for your intended platform. A mismatched export can result in awkward cropping, black bars, or noticeably reduced quality once your content is uploaded and further compressed by the platform.
Common Mistakes to Avoid While Shooting
Even with the best intentions, a handful of recurring mistakes consistently undermine otherwise solid smartphone footage. Overusing digital zoom, shooting in low light without adjusting settings, and ignoring basic composition principles remain among the most common issues creators encounter. These errors are genuinely easy to fix once you become aware of them, which is exactly why understanding how to shoot with a smartphone correctly, rather than just casually, matters so much in practice.
Other common pitfalls include forgetting to properly stabilise shots, recording in the wrong orientation for your intended platform, and skipping a quick lens check right before filming begins. Avoiding these simple, preventable mistakes consistently is what separates amateur-looking results from content that appears deliberately crafted, well planned, and genuinely professional from the very first frame to the last.
Read More: https://techustime.co.uk/how-does-a-smartphone-camera-work/
FAQs
Can I shoot professional-quality video with just a smartphone?
Yes, absolutely. With strong lighting, proper stabilisation, and thoughtful camera settings applied consistently, modern smartphones can produce footage that looks genuinely broadcast-ready and performs well across social platforms, often rivalling dedicated cameras for most everyday content creation needs, without requiring specialised training.
What is the best mode to use when shooting with a smartphone?
Pro or Manual mode gives you meaningful control over exposure, focus, and white balance, which proves especially useful in tricky lighting conditions. Auto mode works reasonably well for casual, well-lit scenes but often struggles noticeably in complex, mixed, or low-light shooting conditions.
Do I need extra accessories to shoot good smartphone video?
Not strictly, though a tripod, gimbal, external microphone, or clip-on light can meaningfully improve your results over time. These remain helpful upgrades rather than strict requirements, and plenty of genuinely great shots are achievable using only the core techniques covered throughout this guide.
Should I shoot in RAW or standard photo and video format?
RAW format preserves considerably more detail and offers greater flexibility during editing, making it well suited to serious or professional projects. Standard format remains more convenient and uses noticeably less storage space, which suits quick, casual, everyday shooting situations perfectly well.
What’s the ideal video resolution and frame rate for social media?
1080p or 4K resolution works well across most major platforms currently in use. Use 24 to 30 fps for standard storytelling content, and switch to 60 fps when you want smooth, high-quality slow-motion footage for action or dynamic, fast-moving subjects.
How do I avoid shaky footage without owning a gimbal?
Use a firm two-hand grip, brace your arms against your body for added support, and walk with slightly bent knees to absorb movement naturally. Many modern phones also include built-in software stabilisation that further smooths out handheld footage automatically during recording.
Conclusion
Great smartphone photography and video ultimately come down to technique, preparation, and intention rather than expensive equipment or the latest camera specifications. Prioritising good lighting, steady footage, thoughtful composition, and clean audio will improve your results far more than any camera upgrade could on its own. These ten tips give you a practical, repeatable framework for approaching every single shoot with greater confidence and consistency.
The next time you pick up your phone to film or photograph something meaningful, try applying two or three of these techniques together and compare the noticeable difference in your results. Practising how to shoot with a smartphone deliberately, reviewing your footage critically afterwards, and adjusting your approach each time you shoot is genuinely the fastest path toward visibly better, more professional-looking content over time.