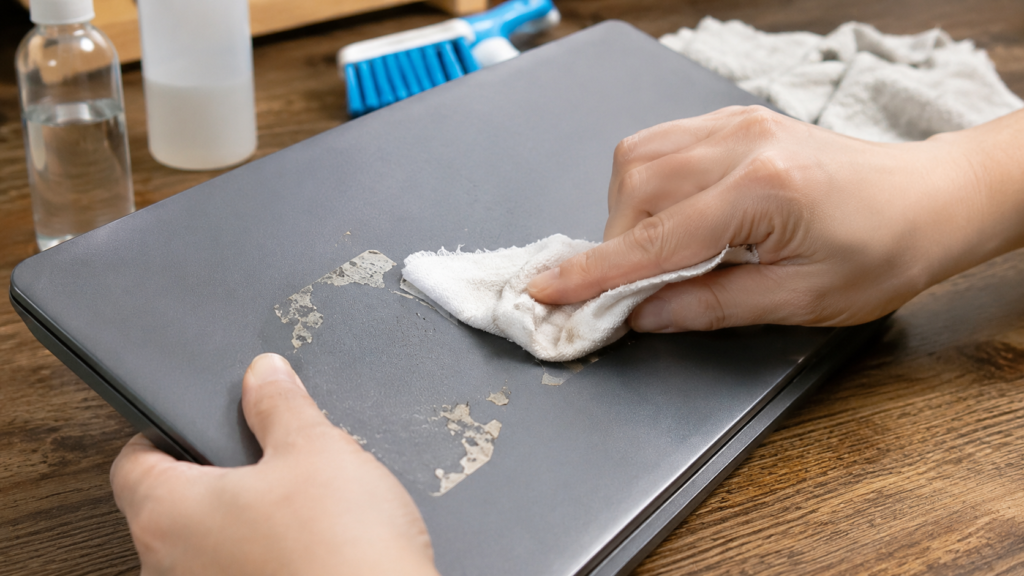

Peeling off an old sticker is the easy part. The sticky, grimy outline it leaves behind is what actually causes frustration, especially when you’re trying to keep your laptop looking clean and professional. If you’ve been searching for how to get sticker residue off laptop surfaces without scratching them or leaving a cloudy mark, you’re in the right place. This guide breaks down five safe, tested methods, the tools you’ll need, and the precautions that keep your device looking untouched once the job is done.
Sticker residue isn’t just an aesthetic annoyance — left untreated, it collects dust, fingerprints, and grime over time, making your laptop look far older and dirtier than it actually is. The good news is that removing it doesn’t require expensive products or professional help. With a few household items and a little patience, you can safely restore your laptop’s surface, regardless of whether it’s plastic, aluminum, or painted.
Why Sticker Residue Is So Stubborn to Remove
Adhesive residue clings so persistently because sticker glue is engineered to bond permanently to whatever surface it touches. Over weeks and months, exposure to heat, sunlight, and everyday handling causes that adhesive to harden, oxidize, and thicken into a stubborn film. This is exactly why picking at it with a fingernail rarely works well and often smears the residue across a wider area instead of lifting it cleanly away.
The material your laptop is made from also determines how the residue behaves and how it should be treated. Plastic surfaces can absorb certain solvents and discolor if the wrong product is used, while aluminum or painted finishes are more prone to visible scratching from abrasive tools. Before attempting to remove sticker residue from laptop surfaces at home, take a moment to identify your laptop’s casing material so you can choose the gentlest method that still gets the job done effectively.
What You’ll Need Before You Start
Having the right supplies ready before you begin makes the entire process faster, safer, and far less messy. At a minimum, gather a microfiber cloth, a handful of cotton swabs, an old plastic card such as an expired gift card, and a bowl of warm soapy water. These basic household items are enough to tackle most sticker residue situations without spending extra money on specialty products.
For older or more stubborn residue, it’s worth keeping a commercial adhesive remover, such as Goo Gone, within reach as a backup. Whichever product you choose, always test a small amount on a hidden area of the laptop first, such as the underside near a vent cover. This simple patch test can save you from unpleasant surprises like clouding, staining, or changes in surface texture on a part of the laptop that everyone can see.
Five Safe and Easy Ways to Remove Sticker Residue
Isopropyl rubbing alcohol remains the most reliable way to remove sticker residue from laptop surfaces because it dissolves adhesive quickly and evaporates cleanly without leaving a greasy film behind. Dampen a microfiber cloth or cotton swab with alcohol at 70 percent or higher concentration, then press it firmly against the sticky patch for 1 to 2 minutes so the liquid has time to soften the glue underneath before you attempt to wipe it away.
If your laptop has a painted, matte, or otherwise sensitive coating, cooking oil or mineral oil offers a gentler alternative that’s far less likely to affect the finish. Olive oil, vegetable oil, or even baby oil works by slowly seeping into the adhesive and loosening its grip, then wiping the area clean with a damp, soapy cloth to remove any leftover oily residue that might otherwise attract dust.
For residue that’s been sitting for years and has essentially fused with the surface, a dedicated adhesive remover like Goo Gone tends to outperform household alternatives by a wide margin. Apply a small amount to a cloth rather than pouring it directly onto the laptop, rub gently until the glue begins to dissolve, and immediately follow up with a separate damp cloth to lift away any leftover chemical residue before it has a chance to sit too long.
When you don’t have any liquids or cleaning products on hand, the tape method offers a completely dry alternative that still gets solid results on lighter residue. Press a strip of strong packing tape, or the sticky side of the sticker you just peeled off, firmly against the residue, then slowly pull it back, repeating the process several times until most of the stickiness has lifted from the surface.
Anyone who prefers a natural, chemical-free approach can rely on a simple baking soda paste made by mixing baking soda with a small amount of water. The mild abrasive texture, combined with moisture, gradually loosens adhesive, so apply the paste directly to the residue, let it sit briefly, then rub gently with a cloth before wiping the area down with a separate damp cloth to finish.
Important Safety Tips and Precautions
Regardless of which method you choose, a handful of safety rules apply universally and should never be skipped. Acetone or nail polish remover should never come into contact with a plastic laptop body, as it can melt, warp, or permanently cloud the casing within seconds. Sharp tools like razor blades or knives are equally risky, as even a careful hand can leave a visible gouge or scratch that’s impossible to reverse.
Liquids of any kind should always be kept well away from vents, ports, the keyboard, and the screen, since moisture that seeps into these openings can cause lasting damage to internal components. If liquid happens to get near any of these sensitive areas during cleaning, power the laptop off immediately and let it dry completely before turning it back on, for extra peace of mind against electrical issues.
Tips for Different Laptop Materials
Plastic-bodied laptops generally respond best to gentler treatments such as oil or baking soda paste, since stronger solvents can occasionally dull the finish or leave faint discoloration over time with repeated use. Aluminum laptops, including most MacBook models, typically tolerate isopropyl alcohol well. However, it’s still smart to use only a small amount of liquid and wipe promptly to prevent pooling near seams or edges.
Laptops featuring matte coatings, printed logos, or decorative finishes deserve extra caution no matter which removal method you’re leaning toward. Always spot-test in a hidden corner first, because these specialty surfaces can react very differently to alcohol, oil, or commercial adhesive removers compared to a standard glossy shell or brushed metal finish, and a small test saves you from a costly mistake.
How to Prevent Sticky Residue in the Future
The simplest way to avoid this entire hassle in the future is to stop placing stickers directly onto your laptop’s outer shell. Removable vinyl stickers or dedicated laptop skins let you personalize your device just as much without leaving behind any permanent residue, and they can be swapped out or peeled away cleanly whenever your taste changes or you decide to sell the laptop.
If you do prefer traditional stickers, try to remove them sooner rather than letting them sit for years at a time. The longer adhesive remains exposed to heat, sunlight, and general wear, the more it hardens and chemically bonds to the surface beneath it, so peeling stickers off within a few months rather than years makes any future cleanup dramatically faster and easier to manage.
Read More: https://techustime.co.uk/why-is-my-laptop-not-charging/
FAQs
How do you get dried, old sticker residue off a laptop?
For residue that’s hardened over time, let alcohol, oil, or a commercial remover sit on the spot a little longer than usual so it can fully soften before you attempt to wipe it away. Avoid scraping with anything sharp, since dried adhesive tends to flake unevenly and can scratch the surface if you try to force it off too quickly.
How do I specifically remove sticker residue from a MacBook?
Isopropyl alcohol is generally considered safe for the aluminum bodies used on most MacBook models. Apply it sparingly with a microfiber cloth, keep excess liquid away from the keyboard and ports, and wipe the surface dry immediately after the residue lifts to prevent moisture from lingering near sensitive seams.
Can I use nail polish remover to remove sticker residue on my laptop?
No, acetone-based products are far too harsh for most laptop materials and can melt, warp, or permanently cloud plastic casings on contact. Stick to isopropyl alcohol, cooking oil, or a dedicated adhesive remover like Goo Gone instead, since these options are effective without risking irreversible damage to the finish.
Will removing a sticker damage my laptop’s finish?
Not if you stick to gentle, tested methods and steer clear of sharp tools altogether. Using alcohol, oil, baking soda paste, or the tape method, combined with a quick patch test on a hidden area beforehand, keeps the risk of scratching or discoloration extremely low throughout the entire process.
What household items work best for removing sticker residue without buying anything special?
Rubbing alcohol, cooking oil, baking soda paste, and the tape method all rely on items most households already have on hand. Each one works slightly differently, so you can choose based on your laptop’s material and how stubborn or long-standing the sticker residue is in your situation.
How long should I let alcohol or oil sit on the residue before wiping it off?
Isopropyl alcohol typically needs about one to two minutes of contact time to loosen adhesive effectively, while oil may require a few extra minutes to dissolve more stubborn residue fully. Check the progress gently every so often rather than rubbing continuously, which helps avoid unnecessary friction on the surface.
Conclusion
Sticker residue can feel like a stubborn, permanent nuisance, but as this guide demonstrates, getting sticker residue off laptop surfaces safely really comes down to matching the right method to your device’s material and giving the process a little patience. Whether you reach for rubbing alcohol, oil, Goo Gone, tape, or a simple baking soda paste, there’s a gentle option suited to virtually every laptop and every level of stubborn residue. Take your time, test a small area first, and your laptop will look brand new again without a single scratch.